Modular making in the third dimension
Georgia Redpath describes her journey with intricate mould-making techniques to create an endless variety of geometric forms in glass
I am, by background, a relief caster; my casting process sprang from collagraph printmaking techniques. As a first-year art student, back in 2003, I was taught about mould making at a point when I was spending most of my time in the print workshop. By chance, around the same time, I read a 1970s book on etching, which suggested taking plaster or latex casts from collagraph plates. It was only a couple of brief paragraphs, but these were the kindling for my future practice.
I started making collaged plates, which were far too deep to be allowed anywhere near a printing press. Instead, I cast them in rubber (Gelflex), and then took investment moulds from the rubber, which were used for casting glass.
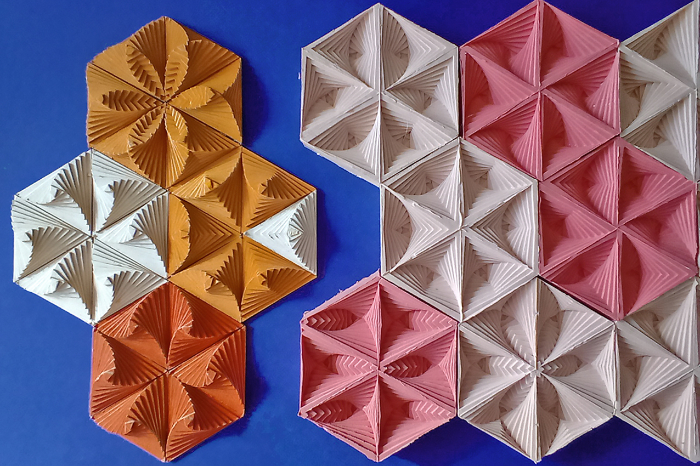
These initial relief casts were predominantly representational, although their focus was often the repeating pattern and texture of the urban landscape. Over time, this gradually shifted towards pure pattern, with simple, repetitive geometry finally taking over entirely. It was this shift that steered me towards a modular approach to making – after all, pattern is centred on repetition, and many geometric shapes will tessellate to cover surfaces. By making collage models of the repeating elements, rather than the whole pattern, I could reuse and reconfigure them to make several moulds – each related but entirely different.
While I was very taken with the efficiency of this slight change in my process, I was also excited that it introduced a stage of play and discovery – remixing the modular units to create something new was very much like playing with a box of LEGO bricks.

Over the next couple of years, I developed from making modular cardboard models, to making modular silicone moulds. This was partly motivated by the cost of silicone as, by making modular moulds, I knew I’d get far more use from each mould and so better value for money! However, the silicone modules also took me from relief panels into something much more like three dimensions; they were much higher in relief than anything I’d made before. In addition, they could be attached (via a bolt) to underlying wooden or cardboard forms, meaning I was no longer confined to a flat surface.

While the underlying surfaces could have their own form and dimensions, they had to conform to the geometric base shapes of my modules – triangles, squares and pentagons. This meant that the options were relatively limited. I’d had an initial taste of three dimensions, but I wanted more!
For this reason, when I started my PhD at the University of Wolverhampton, one of my main objectives was to develop a family of 3D modules, which could be joined together to create sculpture, and explore pattern, in the round. Alongside this creative aspect, I still had a hankering to increase efficiency in my casting process. I wanted to discover whether the modular aspect of making could be pushed further into the casting process; were modular investment moulds possible?
From experience, I knew that regular, geometric shapes worked well for modular systems; matching edge lengths had allowed both my cardboard and silicone modules to work together in myriad different combinations. Therefore, I decided to focus on the equivalent 3D forms when choosing my basic module, so looked at the Platonic solids. Of the five, the icosahedron (which has 20 triangular faces) seemed most attractive. It was symmetrical, related to both pentagons and hexagons, and the 20 faces offered many options for joining modules together.
Almost as soon as I’d made this choice, we went into the first COVID-19 lockdown. Although initially frustrating, this turned out to be a bonus for me. I’d realised that cardboard would no longer be the perfect modelling material for 3D. I needed something with greater accuracy and stability and 3D printing seemed the obvious choice. Lockdown gifted me the time to get to grips with the necessary software without the distractions of normal life. More than this, I was able to benefit from a sudden explosion in free online courses.
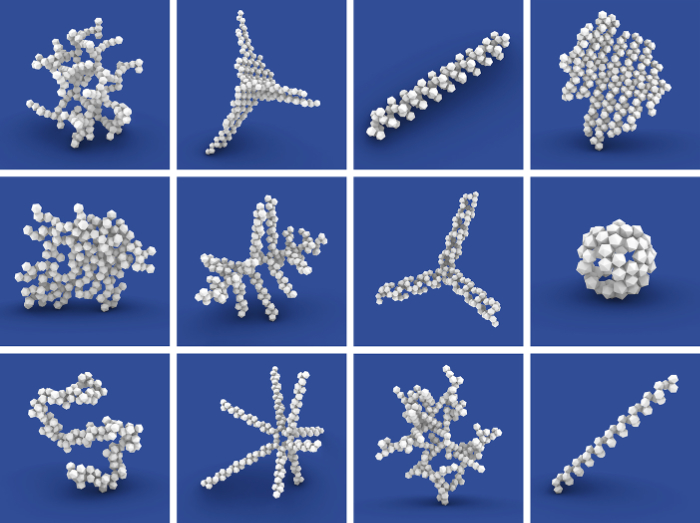
Most exciting was finding Wasp, a plug-in for my CAD software developed by Andrea Rossi, an architectural PhD student in Germany. This allowed me to take my module (eg my icosahedron) and create rules for the number of modules being joined, and how. Wasp then automatically carried out these instructions at the click of a button. The complexity and variety of forms that populated my laptop screen provided the impetus needed to begin work on a modular investment system.
Starting with a simple, two-part mould for creating a single icosahedron, I designed a series of variations on that mould. Each member of this extended family would be useless as a mould itself, as extra faces were cut away, meaning the glass would leak out. However, by joining these moulds together, I’d be able to create strings, branches and networks of icosahedra.
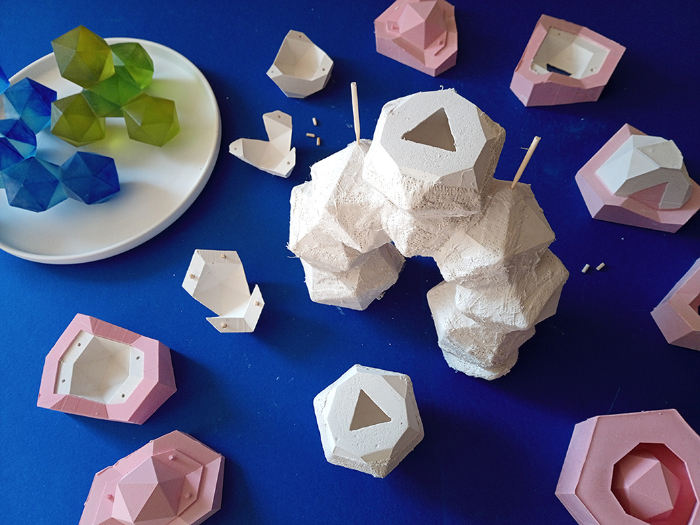
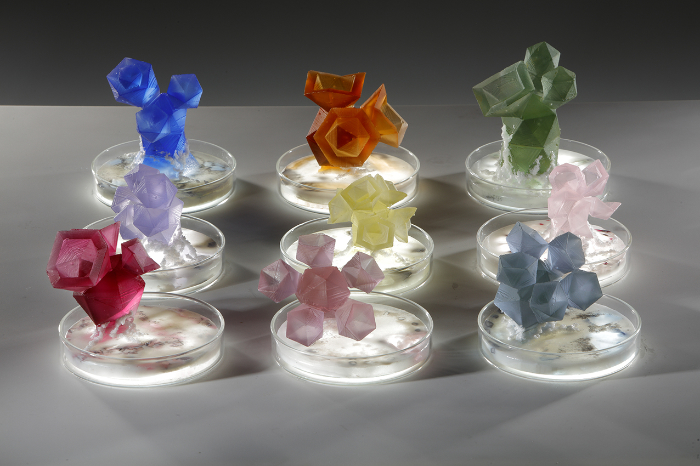
Once the form of the modular investment moulds was fixed, I needed to make silicone moulds of the forms. This would allow me to make multiple copies of each mould part in investment. This was certainly a challenge in my little flat but, by the time we were allowed back in the workshops at Wolverhampton, I had my first multi-part modular investment mould ready for testing. There were five joined icosahedra in the final form, so the mould had 10 parts, which had been joined together with plaster bandage and an additional layer of investment. I was overjoyed when the mould survived the firing intact, and I divested to find my first icosahedral form. Modular moulds worked!
However, after another two test firings, my excitement gradually waned. Despite having different configurations, the first three sculptures looked very similar. To achieve the complex forms I’d created in Wasp during lockdown, I’d need to be joining hundreds of mould parts. In addition, while working with investment mould parts might be efficient, it was enormously frustrating. I was working purely in the negative, unable to see the final positive form as I was building the mould. Constant referral to my computer models was necessary, to work out which mould part to add next.
The sense of fun I’d found playing with my cardboard and silicone modules to create new forms and patterns had vanished; the efficiency had drained all joy from the process.
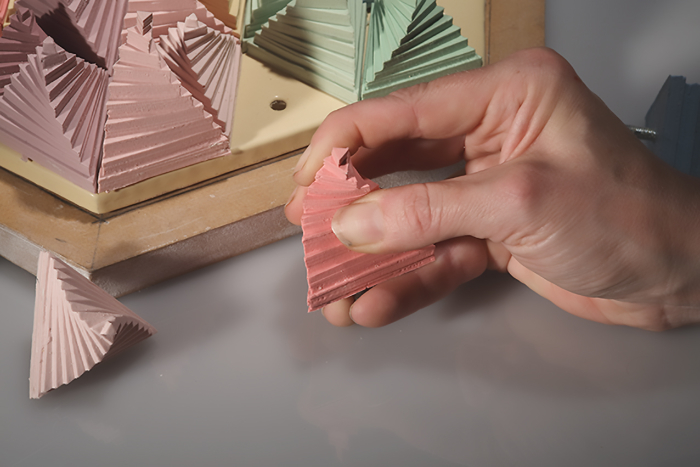
Luckily, silicone moulds aren’t single purpose. Just because they’d been designed to create investment mould parts, didn’t mean they couldn’t be used to cast other materials. I started using them to make wax parts instead, turning the negative forms into positive modular parts. I also made some pure plaster versions of the initial two-part module, which I used to slipcast wax icosahedra.

As someone who had managed to avoid working with wax for most of my casting career, this was an awkward shift. However, the play element returned. I was ‘sketching’ designs with the wax pieces, finding forms which pleased or amused me. Although it was not as quick and simple as LEGO bricks, the wax parts could be joined, and taken apart again, relatively easily. Compositions were then fixed by soldering the parts together with a little hot wax tool.

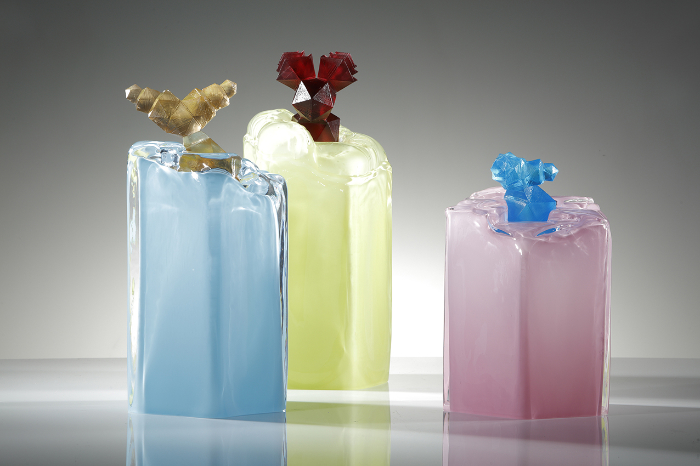
This body of lost wax casts formed the core of the practical work for my PhD and was shown in my recent solo exhibition at Stourbridge Glass Museum. For me, the more important realisation was that this only scratches the surface of what is possible with the kit of parts I’ve developed. The initial shift from making parts in investment to making parts in wax made me reconsider all the unseen artefacts of the casting process – the 3D printed models, silicone moulds and plaster moulds which created my modular waxes. All these ‘tools’ offer multiple possibilities. For example, a mould originally used for casting a base also worked in the hot shop as part of a blow mould. Each shift in use offers new pathways to explore, while retaining the connection to the original icosahedron.
So, although I didn’t achieve the efficiency I originally hoped for, the very nature of the casting process, combined with my modular obsession, means that I have a 3D world of possibility to explore for years to come.
About the artist
Georgia Redpath is a glass artist based at the Ruskin Glass Centre in Stourbridge, UK. She specialises in kiln-cast glass, often in conjunction with other processes and materials.
Her work has been exhibited internationally, and she teaches her collage casting techniques both in the UK and abroad.
In 2019 she won the Open category of The Glass Prize, run by Warm Glass UK.
To commission a piece or discuss a collaboration, contact her on email: redpathglass@gmail.com. To see more of her work and processes, follow @RedpathGlass on Instagram or check out her website.
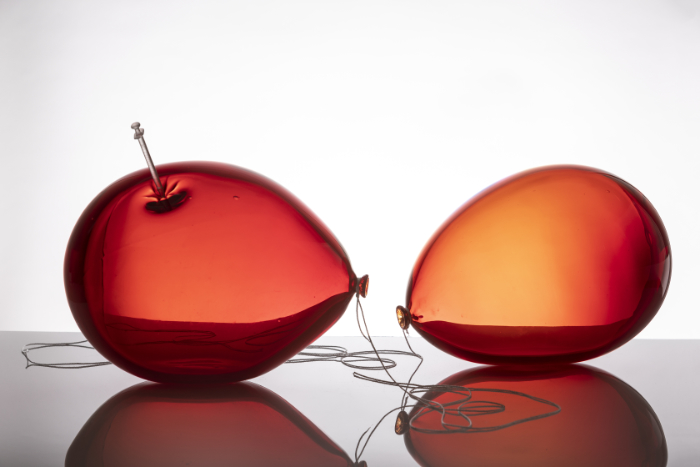
Main feature image: ‘Tonight, Pinky…’ by Georgia Redpath. Photo: Simon Bruntnell.
Related Articles
08-04-2026
Glass artist interview: Off the scale
06-03-2026